Wanting to use SSL on localhost isn’t something we need most of the time, but a recent project required me to finally push through and get this set up. Despite several abandoned attempts in the past, I knew it was possible and scoured the internet for some tips to help finally get this done. I thought I would make some notes here in case I need to refer back to them later, and they may help you too.
Since we are working locally, you can create a self-signed certificate using tools like OpenSSL or the built-in Certificate Management console in Windows. Not having OpenSSL set up, I opted for the built-in WIndows option.
Step 1 : Create the self-signed certificate with PowerShell
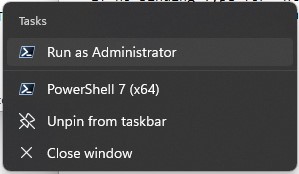
- Right-click to open PowerShell *as an administrator*
- Enter this command to create certificate
New-SelfSignedCertificate -DnsName "localhost" -CertStoreLocation "cert:\LocalMachine\My"
- If you get an “access denied” error when trying to run this, you probably didn’t open PowerShell as an administrator.
- Once this is one, the local certificate will have been created.
Step 2 : Open MMC (Microsoft Management Console) to install certificate
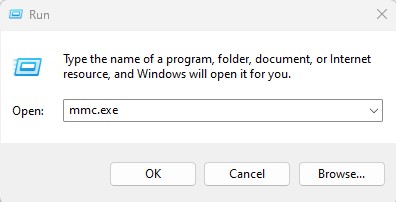
- Right-click on the Start icon and choose RUN and type in mmc.exe
This will pop up a confirmation for you to allow this console to run with elevated privileges. - Once open, go to
File > Add or Remove Snap-ins > Certificates > Add > Computer account > Local computer - Expand the
Personalfolder and you will see yourlocalhostcertificate:
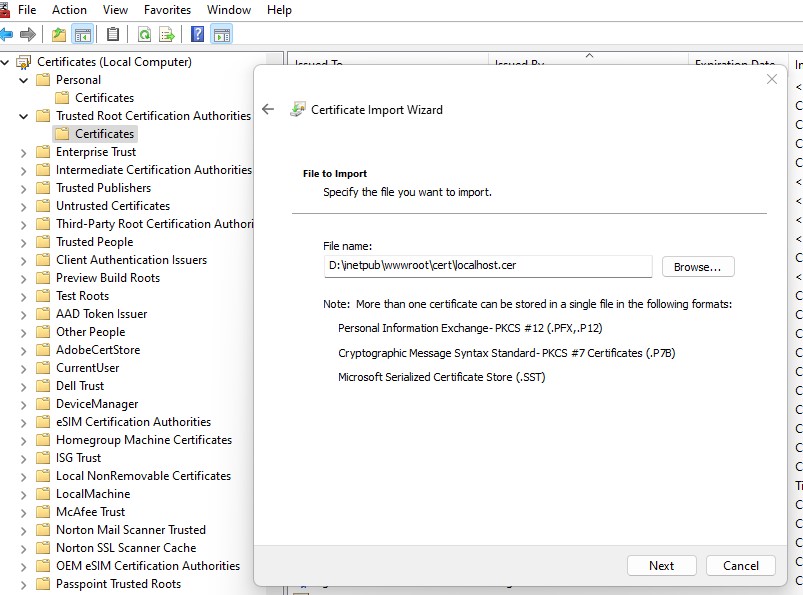
Step 3 : In MMC, copy certificate into Root Certificate Authority folder
- Down a few spots from the
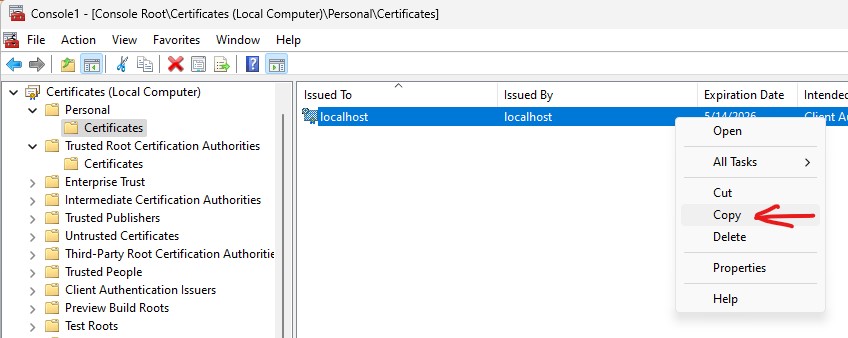
Personalfolder, expand theTrusted Root Certification Authoritiesfolder, thenCertificatesinside of it - Right Click on the localhost certificate and go to
All Tasks > Exportto save it locally some place. You could optionally just use COPY at this point too. - In
Trusted Root Certification Authorities > Certificateseither right-click and choose Import to import the certificate you just exported, or simply Paste (Ctrl+V) to add the copied “localhost” certificate to the folder.
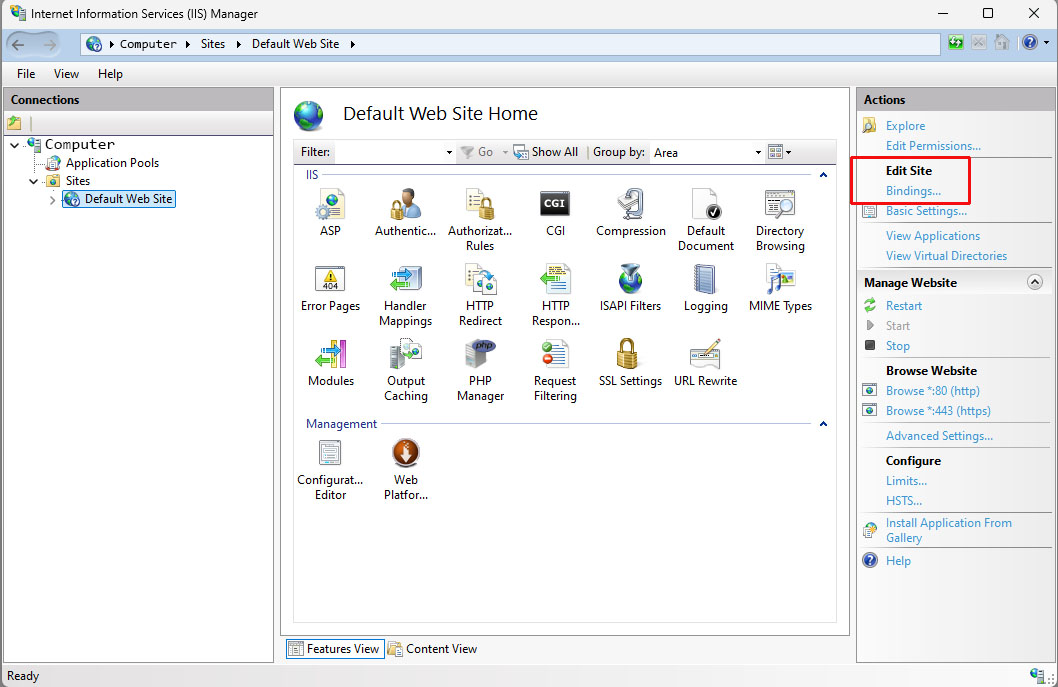
Step 4 : Open the IIS (Internet Information Services (IIS) Manager
- Go to Start and type in “IIS” and choose the Internet Information Services Manager to open it, ir simply go to Start > Run and type inetmgr.exe.
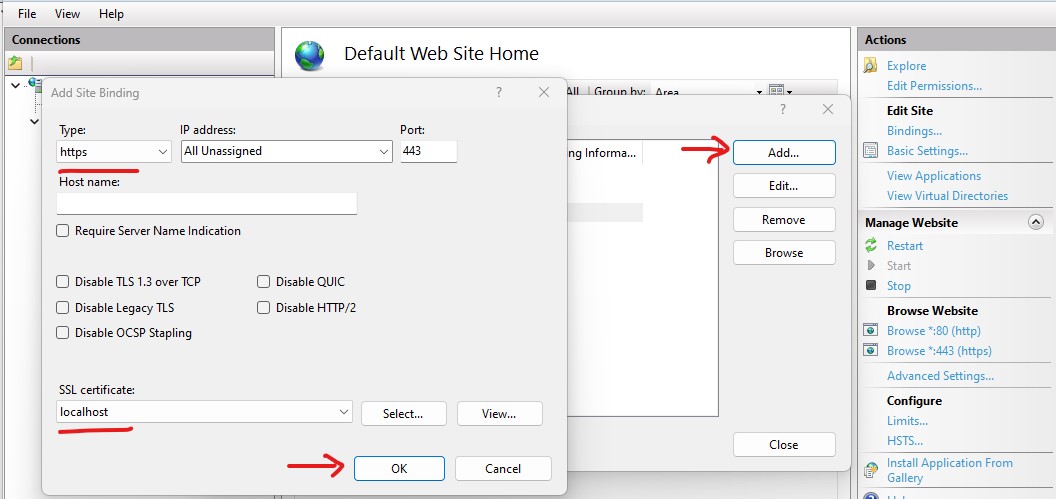
- Once open, go to the right side and click on Bindings to add the HTTPS binding to your Default Web Site
- in the SSL Certificate dropdown, select the
localhostcertificate you created. If you do not see it there, ensure it was successfully imported or copied into theTrusted Root Certificate Authorityfolder. - Once HTTPS and the localhost certificate were selected, click the OK button to continue.
Step 5 : Testing that your SSL is installed
- Go to
Start > Runand typeiisreset, or right-click on your Default Web Site in IIS and choose restart to refresh IIS. I would also close and re-open browsers at this point.
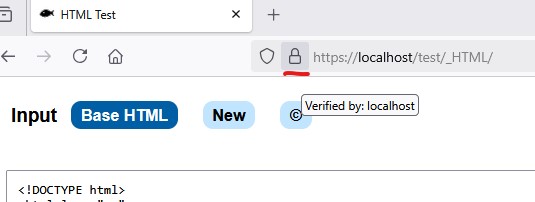
- SSL should now be functional on localhost! Try to browse a local project with https://localhost/ to verify.
- Note that some browsers may still throw a warning about self-signed certificates, but you can accept the warning to move ahead…
I looked through many sites for steps to do this, but finally a few narrowed it down for me. Thanks to the folks on this StackOverflow thread (and this one) for pointing me in the right direction!

